Okay now that I have that out of the way, it time to share my photos for the Tuesday's photo challenges.
I have to say that I am obsessed right now with editing photos in Photoshop. My usual work flow was to edit my photos in ACR, take them to Photoshop and sharpen then leave them alone.
This past two weeks I have been taking Kim Klassen's Skinny Mini Course and can I be honest here, my photo editing process has a new twist.

My photo today is of a dead, dry zinnia from my summer flower garden, ( these should have been cleaned out by now). I really miss the color that flowers add to a yard, miss them all ready and winter/fall has just started.
Here is the original image straight from ACR with only exposure adjustments made.

Surprising how something so lifeless can be pretty.
Here is the same image after applying textures, blending modes, levels adjustments and a few other steps. I am not a pro by any means, hence Kim's Course.
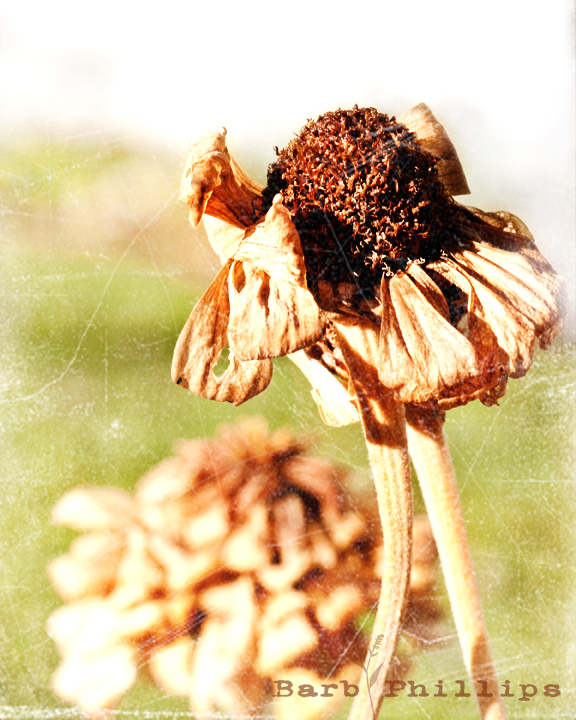
Photo editing steps are as follows -
- Background copy - Blend Mode: Normal - Opacity: 100%
- Adjustment Layer - Solid Color 391d0a - Blend Mode: Soft Light - Opacity: 100%
- Adjustment Layer - Gradient Map: Black to White - Blending Mode: Screen - Opacity: 35%
- Adjustment Layer - Gradient Map: Black to White - Blend Mode: Normal - Opacity : 100%
When working with the two gradient maps, if you click on the gradient map icon in you lalayers pallet, then click on the adjustments gradient map bar the gradient editor will pop up.
Your page will look similar to this -

Steps Continued
- Applied Kim Klassen's light paper texture - Blending Mode: Light - Opacity: 100% - Masked off all but the sky - soft black brush
- Applied Kim Klassen's light paper texture - Blending Mode: Light - Opacity: 100% - Masked off all but the sky - soft black brush
- Copied Background - Blend Mode: Soft Light - Opacity: 100%
- Adjustment Layer - Levels - tweaked till dark, lights and contrast looked proper
- New layer - added brush signature
- Image - Duplicate - Re-sized - Saved for Web


12 comments:
Awesome work and results! Aren't you glad now you hadn't pulled the flowers up yet? I adore photoing dried flowers, weeds, etc.
This is such a great tutorial, thanks!!
I love the texture.
This is a lovely photo with great texture. Thanks for sharing your steps.
You started with a beautiful image...the edit is quite lovely.
I love the texture. Not sure I know how to do it, but hopefully I will have some time this weekend to experiment. Your photo looks amazing!
Great shot to start with and I love the "look" adding the texture gives it.
Nice edit ~ love the texture! Thank you for the tips too.
It's amazing how beautiful dead flowers can be! Your processing really shows them off to their fullest!
Great editing...looks like fun to play with a photo like that.
Love the Texture!
kiev escort girls ))
Post a Comment